
I know it’s been a long time since I’ve updated this blog (send all complaints to the Tufts biochemistry department), but if you’ve missed me I have good news for you! This spring I’m writing a column for the Tufts called Channeling Ina (aka Queen Ina Garten) where I’ll be writing about all things food on the Tufts campus and in Somerville. The first column is here, and future installments will be published every Thursday.
Shishito Pepper Pesto Pizza

I’ve been home for two months, and while I’ve been baking, cooking, and sharing food with my family and friends, I haven’t blogged once. Sure, I had a bake sale, made some diabetes-inducing sticky buns for Father’s Day breakfast, and burned through our stashes of olive oil and butter at an unprecedented rate, but nearly everything I made was an old recipe of mine or from a cookbook—tried and true recipes that I had been waiting for months to make in a kitchen equipped with more than a not-quite-level stove, rickety table, and a medicine cabinet mirror. I made pots of black beans, thai curries, and dozens of cookies, but with all of those recipes already tucked away on this site I saw little point in adding to the redundancy that seems to take over the internet, one food blog at a time.
Last night’s pizza was what finally convinced me to log back on to Word Press. Also, my mom asked if I had let the blog go dormant, and you just can’t ignore a comment like that from the people that raised you and are sending you to college (hi, Mom and Dad), so I figured a post on this pizza was in order.
Homemade pizza is a staple at our house, and while we normally go the carrot-walnut or margherita route I thought it was time to shake things up a bit with a few handfuls of shishito peppers that were taunting me in the crisper drawer. Shishito peppers, or their Spanish equivalent, padrón peppers, have been cropping up in recipes and restaurants more regularly, especially now that Trader Joe’s carries them and nearly every tapas restaurant serves blistered padróns alongside squares of Tortilla Española. They should come with a warning though: most of them are fairly mild, but every so often you come across a real scorcher. (Engineers out there: the probability of a spicy pepper is about 10%, though that statistic is a rough guideline when you factor in growing conditions and other environmental factors. You may just have to dive into this pizza and hedge your bets.)
Once blistered in a hot pan, shishito peppers are smoky with a lingering grassiness, and when paired with golden brown mushrooms and cherry tomatoes that have been sautéed in a hot pan until split open, you’ll wonder you’ve never piled the three onto a pizza with fresh mozzarella and aged parmesan. A final few dollops of homemade basil pesto when the pizza comes out of the oven ties the whole pie together, and before you know it you’ll be wishing you had made extra.

Shishito Pepper Pesto Pizza
Makes 4 10-inch pizzas, serves 4-6
2 lbs pizza dough
1 lb shishito or padrón peppers
4 teaspoons olive oil
Kosher or sea salt
1/2 yellow onion, finely diced
1 lb cherry tomatoes
1lb button mushrooms, sliced
Cornmeal, for the pizza peel
12 oz. fresh mozzarella, torn into 1/2 inch pieces
1/2 cup fresh grated parmesan
1/4 cup freshly made pesto
- Once your dough has been made, divide it into 8 oz. portions and roll them into even balls. Place on a lightly floured surface, cover with a kitchen towel and let rise for 1 hour, until nearly doubled in size.
- Preheat the oven to 500F and place your pizza stone on the top rack of your oven.
- While the dough rises prepare all of the toppings:
- For the blistered peppers: Heat 1 teaspoon of olive oil in a cast-iron skillet over high high for 5 minutes. Add the peppers and 1/4 teaspoon of kosher salt and cook, stirring every minute until the peppers are blistered in spots and tender, 8-10 minutes. Transfer the peppers to a small bowl and let cool slightly, then remove and discard the stems and cut the peppers into 1 inch pieces.
- For the tomatoes: Heat 1 teaspoon of olive oil over medium heat in a 12-inch skillet. Add the onions and saute for 2-3 minutes, until nearly translucent. Add the tomatoes and 1/4 teaspoon salt, and cook for 15-20 minutes, until the tomatoes have split and have begun to cook down. Transfer the tomatoes to a bowl and set aside.
- For the mushrooms: Heat the remaining 2 teaspoons of olive oil in the same pan that you used to cook the tomatoes (unless you really like doing dishes, in which case go right ahead and get out a fresh pan), then add the mushrooms and 1/4 teaspoon kosher salt. Saute until tender and golden brown, 12-15 minutes. Transfer the mushrooms to a bowl and set aside.
- To assemble the pizzas: Roll out the risen dough into a thin, 11-12 inch circle, then transfer to a pizza peel dusted with cornmeal. Top evenly with 1/4 of the tomatoes–this will not be a pizza with a traditional layer of sauce, so don’t worry if the tomatoes haven’t become soft enough to be considered a sauce.
- Add 1/4 each of the mushrooms and the peppers in an even layer on the pizza. Spread 3 oz. of the cheese in an even layer on top of the vegetables, then sprinkle on 1 tablespoon of parmesan. Transfer the pizza from the peel to the preheated pizza stone, and bake until golden brown and crisp, 11-14 minutes.
- Remove the pizza from the oven, and lightly dollop 1 tablespoon of pesto over the top of the pizza–again this should be more like a Jackson Pollack painting, than a smooth layer of pesto. Sprinkle 1 tablespoon of parmesan over the top, then slice into wedges and serve. Repeat with the remaining pizza dough and toppings.
Click here for a printable version of the recipe.
Second Annual Bake Sale, June 16th
Many of you probably saw this already on Facebook, but if you didn’t, next Tuesday, June 16th, I’m having my second annual bake sale to benefit the Second Harvest Food Bank! Come by anytime between 3 and 6pm to pick up your favorite cookies, desserts, and baked goods. For more details on location, timing, and menu offerings, click this link here. You can even reserve treats ahead of time if you’re worried about missing out on brown sugar cookies or a jar of salted caramel sauce. I’d love to see you there!
Tasty Tufts: How to Conserve Water in the Kitchen

My latest post on Tasty Tufts has been published, and it includes my top ten tips to reduce water usage in the kitchen. You can find the article by clicking here. Little things like loading the dishwasher correctly and being careful about running the tap can really add up over time when done consistently, and while these habits are especially important for us Californians they’re good ideas for all cooks regardless of your state’s annual rainfall.
In other news, I’m home for the summer! Which means that there are two loaves of bread rising on our kitchen counter and I’ve already seen my brother laugh so much that he accidentally inhaled some mesclun greens at dinner. It’s good to be back.
Tasty Tufts: Food Memoirs

If you haven’t seen it already, I have a new post on Tasty Tufts, and this one talks about one of my favorite areas of literature: food memoirs. I’ll take any chance I can get to spend my free time thinking about food, and spending a few hours with a book all about traveling the world in search of culinary nirvana is a great way to pass a lazy afternoon. The post on Tasty Tufts is the short list of my favorite food memoirs and novels, but if you’re looking for more, perhaps less popular titles, check out On the Noodle Road by Jen Lin-Liu, Mastering the Art of Soviet Cooking by Anya Von Bremzen, An Everlasting Meal by Tamar Adler, White Jacket Required by Jenna Weber, Cooking for Mr. Latte by Amanda Hesser, and Talking with My Mouth Full by Gail Collins. I’m also eagerly awaiting the published of Phyllis Grant’s memoir that will hopefully be just as poignant and gutsy as her blog, Dash and Bella.
Tasty Tufts: Guide to Scandinavian Bakeries

Click over to Tasty Tufts to read my post that tells you all about Scandinavian bakeries! If you love anything involving cinnamon rolls, cakes, danishes, or good bread this is the post for you.
Tasty Tufts: Easy Ways to Improve Flavor

Happy Friday, everyone! Click on over to Tasty Tufts to read my new post on how to improve the flavor while you cook. There’s all sorts of food science and tips for how to apply the information to your meals, whether you eat all your meals in a dining hall or at home.
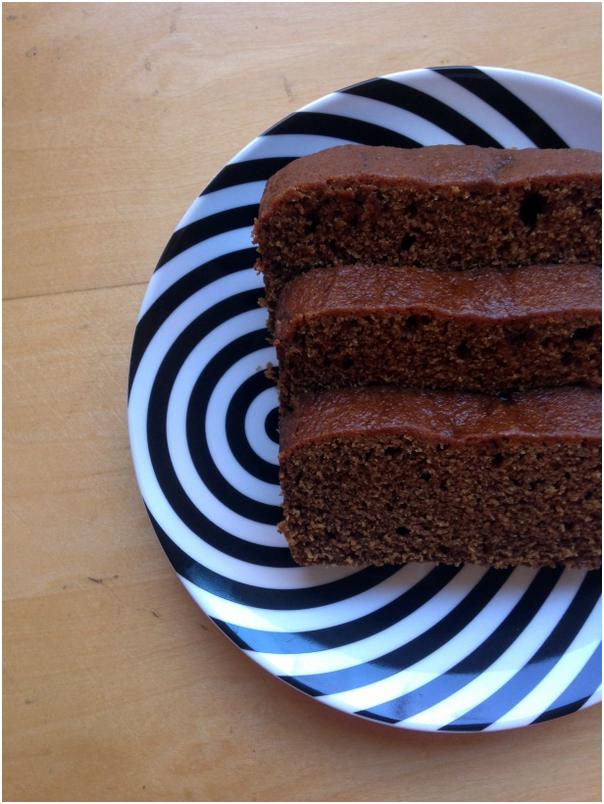
(Unrelated photo, but if you’re looking for a way to celebrate spring break, make a batch of my favorite chocolate chip cookies!)
Tasty Tufts: Bagelsaurus Review

My latest post on Tasty Tufts is a review of my favorite bagel shop on the Red Line–Bagelsaurus. Click here to read my review and read all about the delicious bagel flavors they serve!
Pumpkin Bread and Tasty Tufts
Some of you may already know this, but this semester in addition to posting on Kinsey Cooks I’ll be contributing to the Tufts food blog, Tasty Tufts. It’s a great website full of Boston and Somerville restaurant reviews, recipes, and thoughts on eating in college. My first post (which you can find by clicking here) is the recipe for my favorite pumpkin bread, and more posts will be coming from me this semester. Anytime I have a post on Tasty Tufts, I’ll post the link here on Kinsey Cooks so that you can stay up to date with the Tufts food scene.
Carrot-Ginger Soup

A few weeks ago, I got a text from a friend asking what I had been cooking over break. I immediately sent him a picture of this carrot-ginger soup, and got a recipe request in response along with the accusation that I had “staged” the photo. True, I did set up this picture on the floor of our kitchen near a full-length window, but nothing about this soup is fake–the flavor of carrots is as prominent as the orange color suggests, and the texture is perfectly silky without any milk or cream to deaden the spice from the ginger.

What makes this recipe so revolutionary is the addition of just one simple pantry ingredient. Cooks’ Illustrated came up with the recipe of course, seeing as the test cooks there remained unparalleled in their use of kitchen chemistry in recipes for the home cook’s advantage. Just half a teaspoon of baking soda added to the simmering carrots raises the pH of the soup enough to break down the cell walls of the carrots in record time. It’s the same trick that I use to make stir-free polenta, tender braised green beans, and nutty broccoli pesto. Twenty minutes later, the carrots get pureed into an unbelievably silky soup that is quickly brightened up with a splash of cider vinegar, which is added at the end of cooking to keep the pH in the basic range. The short cooking time has advantages beyond just saving time, too; having the soup simmer for less than half an hour prevents the flavor and heat from the ginger from fading into the background. No fussy straining or special techniques are needed, just sauté some aromatics in butter with ginger before adding the rest of the ingredients, then blend the soup quickly and serve, preferably with a grilled cheese sandwich made with good bread and sharp cheddar.
I made this when I was in the always-temperate Palo Alto, but I would love a bowl of this to combat the twenty degree weather in Massachusetts. No matter the weather outside your house, this soup is a simple, healthful meal that everyone will love.

Carrot-Ginger Soup
Serves 6
Adapted from Cooks’ Illustrated
2 tablespoons unsalted butter (If you need to make the soup vegan, use canola oil or another similarly neutral cooking oil, such as grapeseed.)
2 onions, diced fine
1 ½ tablespoons grated fresh ginger (store your ginger in the freezer to make it easy to grate)
2 garlic cloves, peeled and smashed
Salt and pepper
1 teaspoon sugar
2 pounds carrots, peeled and sliced ¼ inch thick
5 ½ cups water, divided
2 sprigs fresh thyme
½ teaspoon baking soda
1 tablespoon apple cider vinegar
- Melt the butter in a large pot over medium heat. Add the onions, fresh ginger, garlic, two teaspoons table salt, and sugar. Cook, stirring frequently, until the onions are softened but not browned, 5 to 7 minutes.
- Increase the heat to high, and add the carrots, 4 ¾ cups water, thyme sprigs, and baking soda. Bring to a simmer, then reduce the heat to medium-low and simmer, covered until carrots are very tender, 20-25 minutes.
- Discard thyme sprigs. Puree the soup in a blender in two batches until smooth, 1-2 minutes. Return soup to a clean pot and stir in remaining ¾ cup water and vinegar. Return to simmer over medium heat, then serve. Soup can be refrigerated for up to 4 days.
